
In the scenario properties section, general information is provided. This information includes Type, Level, Categories, Targets, Industries, Branding, and Language.
Scenario Image, It is used to upload the image that will be displayed in the application.
Relevant Education, A training related to the created scenario can be selected.

Scenario Information, This is the page where the scenario name and description are entered. Name and description information can be provided in all languages supported by the application.

Email Template, The email template that the user will view is created in this section. The required information in this section includes Sender Name, Sender Address, Subject, Template URL, and Email Content.
Sender Name is the name that will be displayed when the phishing campaign is received by the user.
Sender Address is that the user will see in the sent phishing campaign. The use of the Sender Address can occur in 3 different types:
Registered Domain, where the Phishing domain registered in Settings > Domain is selected.
Custom Domain, the desired domain address for sending is entered.
Include Subdomain, this option is used to add subdomains to either the Registered or Custom addresses.
If there is no registered Phishing domain, the Base domain is used.
Subject is the title of the email displayed to the receiver.
Template URL is the address where the images and links within the sent email will be directed.
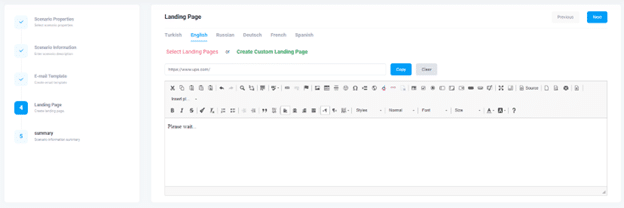
The Landing Page is the page the user sees after clicking the link in the email template within the sent Awareness campaign.
For the pages to be displayed, you can select from previously created pages using Select Landing Pages. A custom webpage can be created for the target user using Create Custom Page.

Summary is where information about the created scenario is provided.
